News:

Don't forget to read the forum rules.

Main Menu
Menu

Show posts

This section allows you to view all posts made by this member. Note that you can only see posts made in areas you currently have access to.

Show posts Menu

Messages - voltergeist

#1
Quote from: MusicalBox on December 04, 2020, 05:57:28 AM
Thanks for the input voltergeist & mvanmanen.

In case anyone is interested:

I ended up buying it for about $2126 even though it needs new hammer heads, hammer rest felt and setup. The Rhodes doesn't pop up often on the market here in Copenhagen, even less in Iceland where I will be transporting it eventually. That's how I rationalize the price to myself at least  ::)  The seller bought it in 2014 for about $2355 and he wasn't in a hurry to get rid of it for way less so if I was going to make my Rhodes dream a reality this was the price it took.  I don't think I will be regretting the purchase  ;D

Congrats!  I think you did ok.  Given your geography you may have done more than ok.  At any rate, you got yourself a very nice piano. 
#2
Quote from: MusicalBox on December 02, 2020, 03:37:09 PM
Quote from: voltergeist on December 02, 2020, 01:53:17 PM
I don't know if it's worth $2230, but it appears to be in exceptionally good condition, at least cosmetically.

So if it plays as well as it looks, perhaps it's worth it?

It looks like it would be a really good one to buy, but $2230 would be a pretty high price for an unrestored 73 Stage in the US, I think.  That said, I would expect to pay a premium for a Rhodes in such good original condition.  If it were me, in the US, I'd try to get them down closer to $1500.  In my mind it's overpriced by about $500. 

I would say, in the US anyway, it would be very easy to find a cheaper one, but difficult to find a nicer one. 
#3
I don't know if it's worth $2230, but it appears to be in exceptionally good condition, at least cosmetically.
#4
Quote from: voltergeist on February 20, 2020, 09:05:20 AM
Quote from: TimeAndTineAgain on February 20, 2020, 04:10:16 AM
My advice. Absolutely chop it. Do it nice like how the big boys do the Wurlitzer 206a chops.

Make it gig worthy with a booty (base) to sit on at home.

No handles.

"Chop it."  There's advice from an ignorant, destructive fool.  All you have to do to make a KMC action "gig worthy" is pull out the action and drop it in a Stage case.

Frankly, if you want a Stage, get a Stage.  If you want a KMC, keep it a KMC.  KMC values will go up as chop-happy dolts continue to destroy the few decent ones that are out there.
#5
Quote from: TimeAndTineAgain on February 20, 2020, 04:10:16 AM
My advice. Absolutely chop it. Do it nice like how the big boys do the Wurlitzer 206a chops.

Make it gig worthy with a booty (base) to sit on at home.

No handles.

"Chop it."  There's advice from an ignorant, destructive fool.  All you have to do to make a KMC action "gig worthy" is pull out the action and drop it in a Stage case. 
#6
Quote from: chet on February 16, 2020, 02:39:22 PM

I'm curious if anyones succesfully removed the keyboard part out of the cabinet without cutting ??
In which case one could then have the option to reassemble at a later date?


The entire keyboard assembly is simply screwed to the cabinet, and can be removed and reinstalled with no alterations whatsoever.  It takes a fair amount of disassembly to get at the screws, though, as I recall. 

My advice would be to just leave it alone.
#7
Restoration Level: Coconut Oil (Organic)
#8
For what it's worth, I sold a mint condition 270 for $1200 a couple years ago.  Probably could have gotten more for it, but sold it to a friend.
#9
The clear stuff used in aerospace (and also seen on that Indycar wheel PWB) is RTV:

https://en.wikipedia.org/wiki/RTV_silicone
#10
Quote from: Tim W on February 10, 2009, 12:24:48 PM
The secret to using an opamp with a unipolar power supply is all in the DC biasing. 

One can bias an opamp running from one 9V battery with half the supply voltage using a resistive voltage divider.  Now,  the opamp's 'ground' reference is actually at 4.5V.  Blocking caps are used on the input and output of the signal path to allow for 'bipolar' signals... recentering them DC-wise around 4.5V for the opamp.

It's also possible to make a split rail from a single DC source.  Basically make a resistor voltage divider between the rail and gnd and put an op-amp in voltage-follower configuration on the center - the output of that op amp is now a low-impedance node creating a new reference "ground", the old ground is now -(1/2)railV and the other +(1/2)railV. 
#11
Attached is a photo of the circuit board from an Indycar steering wheel.  You can see how the mechanical parts are protected against vibration with adhesive around the base of the components. 

(the glossy stuff on the circuit board is conformal coating, to protect against moisture)
#12
Quote from: sean on November 27, 2017, 06:07:28 PM

Voltergeist - I must have missed that post.  Do you still have the photos?  Can you re-host them someplace?

Sean

Photos are back:

https://ep-forum.com/smf/index.php?topic=7885.msg40859#msg40859
#13
The biggest factor in getting "bark" is the pickup distance, from my experience.  One can get too close, so it's a balancing act.  Distance and voicing are key, it'll bark when they're both right. 

Also, the ends of the tines should all be ground flat (to the specified length, ideally).  If a tine end is jagged, its harmonics will be weird and you won't be able to get the pickup distance right.

I agree with priors that felt tips most def will not get you what you're looking for. 
#14
A couple more things I forgot to mention:

Ideally the joint should be clean before gluing.  A thorough cleaning is not really possible in this case, but if you have an air compressor it may be worthwhile to blow any dust/dirt out of the joint prior to injecting epoxy.

Before epoxying the reinforcement blocks in, scrape away paint from the mating areas.  The reinforcement blocks will adhere best if the mating surfaces are 'wood to wood', rather than 'wood to paint' or 'paint to paint'.  Touch up the corners and reinforcement blocks with black paint at the end.
#15
I forgot to mention that when clamping, a third bar clamp should be used across the back to pull the sides in tight.  Good luck!
#16
There are surely other ways to make this repair, but here's the one I've used successfully:

I use a large hypodermic syringe to inject mixed two-part epoxy (I use 1 hour epoxy instead of 5 minute epoxy, so I have more working time before it sets) into the opening, then clamp it with a bar clamp with one jaw at the top of the audience side and the other jaw at the bottom of the player side (so you're pulling the "back" toward the "front" and closing the joint).  Keep it clamped and let the epoxy set.  Then, I cut 3/4"x3/4" corner reinforcement blocks (as were used on later models) and epoxy them into the corners. 
#18
I can dig the piano, but the legs aren't happening.
#19
Quote from: pnoboy on March 31, 2017, 02:43:30 PM

Also, I have never found any overdrive that sounds good with a Rhodes.  If you succeed in that part of your endeavor I would very much like to hear the sounds you get, and if you're willing to share, would like to see the schematic you develop.

I haven't tried this myself, but I'd recommend trying Moog's recent drive pedal(s?).  The overdrive on the Little Phatty is fantastic, and I'm generally not a fan of synth overdrives.  *If* Moog's OD pedals are as good as the Phatty OD, and *if* it works as well on Rhodes as it does on synth (which I would expect it to), it should be a good OD for Rhodes.

Lots of caveats there, but Moog is where I'd go looking for a Rhodes OD.
#20
Suitcase trems don't click unless there's something wrong with them.
#21
The Wurlitzer Electric Piano / Re: Redoing key bushings
January 09, 2017, 12:21:33 PM
I use the clamps Vintage Vibe sells, and they've worked well.  A pair of tweezers and an X-acto knife are my bushing felt tools.  Hopefully you only did the one as in the photos, otherwise you're probably going to have a big headache to deal with.
#22
Quote from: laberge on May 21, 2015, 05:23:05 PM
A quick question on measuring, does this include the tine block, or everything after the tine starts?

It does not include the tine block. 

For those not familiar with calipers, one side is used for outside measurements (say, measuring the diameter of a bolt), and the other side is used for inside measurements (like for measuring the inside diameter of a nut). 

I use the side for inside measurements and put one jaw against the tine block.  Basically just set the caliper to the desired length, lock it down with the tightening screw, put the one jaw against the tine block, and make a mark at the location of the other jaw.  Then I cut the tine a bit long.  Then measure, grind, measure, grind, until the length is correct.  I prefer a fine grit wheel for grinding tines, but a standard grinding wheel is fine. 

#23
If a person is overhauling a harp and going through note by note, why not just bring them all into spec?  O.Lahoz' plan is actually very good, though I haven't done it that way myself.  Move tines up one and grind them all to spec.  That costs one tine and guarantees there will be no too-short tines.   Whatever other problems may occur, you know it's not due to out of spec tine length, and you've set yourself up for the best possible tonal consistency.

I should probably add that if someone is just cutting the tines and not grinding them flat, there's no point to worry about precision in length, they'd probably have bad (or at least sub-optimum) and inconsistent tone simply by virtue of the jagged tine ends. 

Attention to detail adds up to a great piano.  Lack of attention to detail adds up to a not-so-great piano.
#24
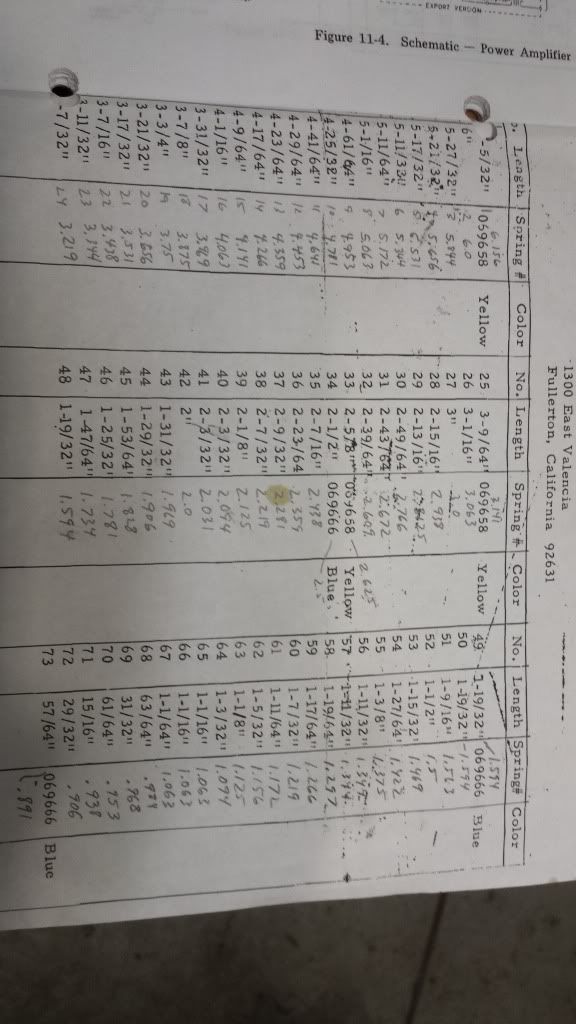
The point is that it's easier and more accurate to use the numerical chart and a caliper than to use that hokey pictorial. 

The chart is straight out of the manual.  All I did was make the conversion to mils.  I don't claim there are no errors in the service manual chart.  Though, it could be that the two runs of three with the same length are not errors but simplifications done for ease-of-production reasons.  #33 appears to be a legitimate error in the manual.

Yes, 1/64 is not a big deal and is not enough to make a discernible difference in tone.  Often enough tines are 1/8" or more out of spec, which is definitely getting into discernible territory, especially for short tines or if a heavier spring is required.  Actually, on the short tines 1/64" could be the difference between a note that rings well and a problem note that drives you crazy. 

#67 is my error - it should be 1.015 mils
#66 looks like it should be 1 1/32, or 1.031 mils
#49 looks like it should be 1 41/64, or 1.641 mils
#48 looks like it should be 1 44/64, or 1.688 mils
#34 looks like it should be 2 31/64, or 2.484 mils
#33 looks like it should be 2 35/64, or 2.547 mils

#25
Don't bother with the pictorial chart. 

Quote from: voltergeist on May 18, 2015, 09:30:08 AM
Regarding tine lengths, here's a notated chart with decimal inch conversions.  This makes it quick and easy to use a digital caliper to measure out tine lengths.  Getting the lengths right helps achieve consistent tone across the board, and proper response from the high register.  When I overhaul a harp, I measure all the tines.  If they're short, but not too short, I generally let them be.  If they're long, I grind them down to spec.  All tines should have their ends ground flat.  This is very important for good tone and should not be overlooked.

A cheap (good enough) digital caliper can be found for around $20 or so at a hardware or home improvement store. 


#26
Quote from: Groove4Hire on May 20, 2015, 02:24:43 AM
Now if only you guys could do as the rest of the world and convert to the metric system this chart would make sense to us on the other side of the pond too... ;-) Haha

All you have to do is push the english/metric button on your caliper.
#27
Quote from: james on May 19, 2015, 11:59:34 AM
Right, that's the visual chart that came with the replacement tine kits. I was talking about the chart in the photo, which gives the specific measurements and mounting spring colors.

That chart is from the Rhodes Service Manual.
#28

I am certainly in favor of a w**ker-free lifestyle!!! Thanks --makes me feel good about my choice.  Now do I approach wankerism with the 100w suitcase and the 3 knob preamp up top? Lol
[/quote]

To avoid looking like a w**ker in that case, don't a big "Fender Rhodes" emblem on the cabinet. 
#29
Regarding tine lengths, here's a notated chart with decimal inch conversions.  This makes it quick and easy to use a digital caliper to measure out tine lengths.  Getting the lengths right helps achieve consistent tone across the board, and proper response from the high register.  When I overhaul a harp, I measure all the tines.  If they're short, but not too short, I generally let them be.  If they're long, I grind them down to spec.  All tines should have their ends ground flat.  This is very important for good tone and should not be overlooked.

A cheap (good enough) digital caliper can be found for around $20 or so at a hardware or home improvement store. 

#30
Looking good, Ray! 
#31
Quote from: ppeterso2 on May 10, 2015, 10:05:56 AM
Ok this is really low tech and simple...
I have a 75 Rhodes  Suitcase 73 piano that is in need of new emblems (ironically the only emblem left is the near perfect condition "Rhodes" speaker amp cabinet emblem).

I suppose my choices are "Rhodes" or "Fender Rhodes" emblems on the back of the piano top and on the front of the action rail.

Anyone ever mixed and matched emblems on the different year models? Any pics to share?

My '75 already has a mixed up look with the black speaker grill btw

Basically, one can put a "Fender Rhodes" logo on an early Mk1 with hybrid hammers and wooden harp supports without looking like a w**ker.  You can't put a "Fender Rhodes" logo on a late Mk1 with plastic hammers and aluminum harp supports without looking like a w**ker.   
#32
Sounds to me like the damper arms are just not adjusted properly.
#33
Quote from: laberge on April 27, 2015, 03:51:35 PM
To the point of turning the tone bars upside down, is there any change in sound by doing this?

From an organization point of view I'd like them to be all neatly arranged but you can't always get what you want!

No, not the tonebars, the clips.  The way you have your clips now you will probably run into the problem of clips interfering with each other (buzzing from contact).  If you alternate the clips (so every other clip is on the topside of the tonebar, and every other clip is on the bottomside of the tonebar) the clips cannot interfere with each other. 
#34
I think I would use gel contact adhesive.
#35
Quote from: laberge on April 27, 2015, 12:34:58 PM
Thanks guys, I'll either get a tech to look at it or just have my dad look at the original schematic and remove any modifications which have been done to it.

What originally went out of the preamp? It's so weird there's nothing that goes out of it other than the external power supply. Was it just the RCA to harp?

RCA is from the harp (the harp output is an input to the preamp).  The four pin circular connector contains power, ground, audio out L, and audio out R. 

The Vintage Vibe cheek block power supply provides a connection for a wall wart and 1/4" outputs for both L&R.  It's a very good solution for suitcase pianos without a bottom cabinet.
#36
The misalignment of the tone bars is due to bent screws, misaligned holes, or both.

The process I use for tines and tonebars when overhauling a harp is this:
1. Remove tone generator assembly
2. Measure tine length, compare to chart
3. Grind end of tine flat and to proper length
4. Polish tine
5. Check if tonebar is straight:  1) the vertical part of the twist is perpendicular to the horizontal part of the twist [z axis] 2) the vertical part is aligned with the horizontal part [in both x axis and y axis].  On bass tonebars with multiple kinks, I try to align each section.
         *Put the end of tonebar with the holes into a vise and use a crescent wrench at the base of the vertical part of the twist to align the vertical part [z axis].  This also works for x and y axis alignment.
6. Align tine
         *Put tine block in vise (as part of the tone generator assembly), tighten screw with impact driver.  Then use a small ball pien hammer and tap on the back of the tone bar to bring the tonebar into alignment with the tine.  Watch the text on the nutdriver on the impact driver and look for when it stops turning- this tells you when to stop (ie it's tight enough, and if you keep driving you'll shear the screw).
7. Reinstall the tone generator assembly with new grommets.
         *Run the threads of the wood screws across bees wax before installing

It's important to grind the ends of the tines flat, since often tines are crudely cut leaving an angled end on the tine that produces weird harmonics and prevents optimum tine/pickup spacing.
The three axis tonebar alignments help get optimum tone and sustain. 
Using an impact driver will enable you to get the tine/tonebar interface as tight as possible, maximizing sustain.  Some people believe tines can be tightened good enough with a wrench.  I think there is a difference here between myself and the wrench-tighteners as to what qualifies as "good enough".
#37
I've found it's better to alternate the orientation of the clips: up, down, up, down.  This way adjacent clips can be put anywhere without interfering with the clip next to it.
#38

Great tip because I have 20 to go!
But, 10 seconds in Kleeer Acetone and the flew right off to bare wood with a large flat blade screwdriver.  But I did note that mine had really gotten stiff over the years.  The looked untouched, but tough nonetheless.
[/quote]

Just to be clear, steaming will only work if the adhesive is water-based.  Just like adhesive that doesn't respond to acetone will respond to steam, adhesive that responds to acetone will not respond to steam.  So, it's one or the other.
#39
Quote from: voltergeist on April 08, 2015, 03:27:32 PM
I don't know how common this is, but on my early '75 the glue on the pedestal felts dissolved with acetone, but the glue on the other felts on the keys did not respond to acetone at all.  I ended up having to steam those out.   

If anyone encounters felts that don't respond to acetone, the process for steaming out felts is actually pretty easy.  Lay a damp rag over the felts of a group of keys, then run a hot iron (a regular household iron) over the rag on top of the felts.  This creates steam, and the adhesive should release and allow easy removal of the felts.  If the felts are not coming out easily, steam them again.  Remove the leftover adhesive with an exacto knife while the glue is still soft from the steam. 
#40
Quote from: smitty.west on April 13, 2015, 01:16:02 PM
I'm in Toronto.

There are a few techs here that could work on it, but I'd prefer to do the work myself.

I've watched the Miracle Mod instructional video which makes it look easy, but honestly speaking, how simple would it be to perform for someone with zero know-how?

That's a tricky question.  Is the miracle mod easy to install?  Yes.  Is it easy to install correctly?  Um... on a late model it's fairly easy.  On an early Mk1 like yours, not as easy.  It's easy to screw up, though.  There is a really good thread on this forum somewhere with diagrams and procedures for installing miracle mod on an early Mk1.   

I would probably recommend starting with the easy stuff - lube the guide pins and pedestal felts.  VV sells guide pin lube.  I forget the lube for pedestal felts- someone can probably chime in.  That's an easy, minimally invasive improvement, and once it's done you'll have a better idea of what the action is really like.  You're currently playing a completely unlubricated piano, so you're getting resistances that have nothing to do with what the miracle mod seeks to improve. 

Starting with simple lubrication is a good way to get familiar with the mechanics before delving into more involved, higher-risk stuff like the miracle mod. 

As far as DIY vs. tech?  That's a tough one, too.  Peoples' skills vary a lot, and I suppose so do the skills of individual techs.  You've got a very nice piano- virtually pristine by the look of it- not exactly the ideal specimen to learn with.  There's a lot of art in getting a 40-year old Rhodes to sound and play its best, not to mention tools, work space, and a lot of time and a lot of work. 

If your main interest is learning to work on Rhodes pianos, I'd say go diy (and expect at best a 50/50 chance of getting the mod right the first time).  If your main interest is playing it, take it to a tech. 

A lot of people don't have the luxury of easy access to a Rhodes tech, nor the luxury of a Rhodes in such beautiful condition.  Really, even if you decide to go diy I'd still recommend taking it to a tech first to get it checked out.  The tech should at least be able to tell you what it needs (most) and give some pointers. 

I suppose it's also worth noting that the action improvement you're seeking may or may not be accomplished with the miracle mod- even if installed perfectly.  There's a lot more to getting good action than just the miracle mod, at least in most cases. 

#41
Low volume would typically be related to the distance of the pickup from the tine.  You can think of the distance of the pickup from the tine as the volume control, and the vertical alignment of the end of the tine with the pickup as the tone control. 

Look at the distance of the pickups around the low-volume cluster and compare it to the distances within the low volume cluster.  Loosen the pickup screw and adjust the pickups (move closer to the tine) in the low-volume cluster to bring them up to the level of the surrounding notes.  If you get a harsh metallic sound on hard strikes, the pickup is too close - back it off just enough to get rid of the metallic sound.  If it's still too quiet at that point something else is going on. 

Low notes need more distance from the pickup for pitch stability, since the magnet will pull the note sharp as it decays if the pickup is too close.  Low notes are a trade-off between volume and pitch stability.

The alignment ("tone control") can also affect volume if it's way out of whack, so compare alignments, too.  Use the audience-side tone generator screw (one of the two screws with rubber grommets) to set the alignment of the tine to the pickup (tone).  The end of the tine should be slightly above the center-line of the pickup.  Use your eyes to rough-in the position, then use your ears to fine tune.  Play up and down through the area you're working on and try to get the tones and volumes consistent from note to note.  Tone and volume are somewhat inter-related, so setting the tone and volume (aka "voicing") is an iterative process. 

There are a whole slew of other factors that could cause problems (fatigued tine, tonebar screw not tight enough, grooved hammer tip, dampers bouncing, etc.), but pickup distance is the place to start. 

Also, the end of the tine should be flat.  Often tines are cut crudely and not ground flat - the jagged end then prevents optimal pickup position (and therefore maximum volume of the note) and introduces undesired harmonics. 
#42
Nice piano.

Hopefully there's a tech in your area.  Where are you located?
#43
I don't know how common this is, but on my early '75 the glue on the pedestal felts dissolved with acetone, but the glue on the other felts on the keys did not respond to acetone at all.  I ended up having to steam those out.   
#44
George Duke with FZ doing Inca Roads with a smogasbord of vintage keys (from The Dub Room Special):

https://www.youtube.com/watch?v=jMXih0g9sxE
#46
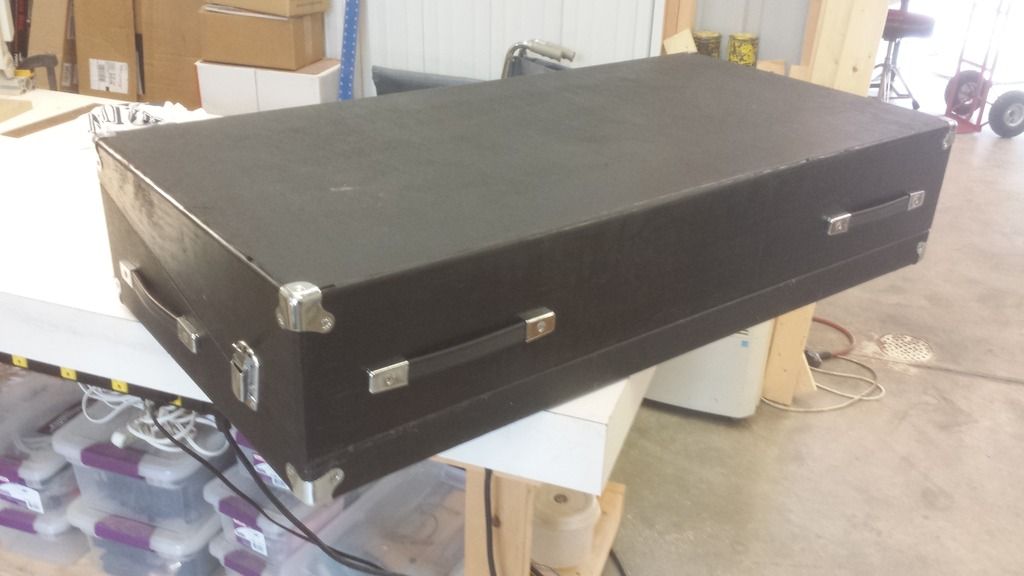
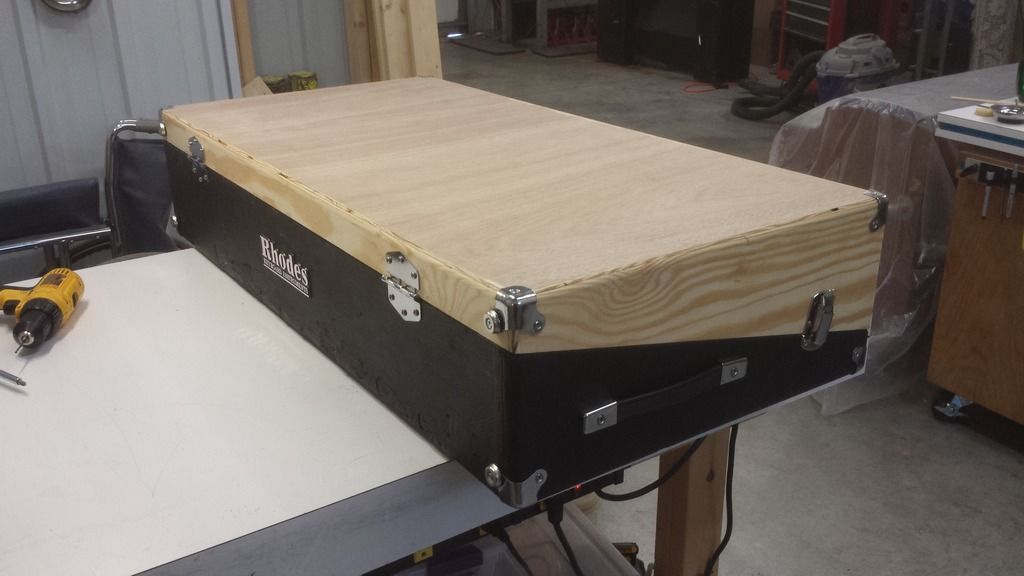
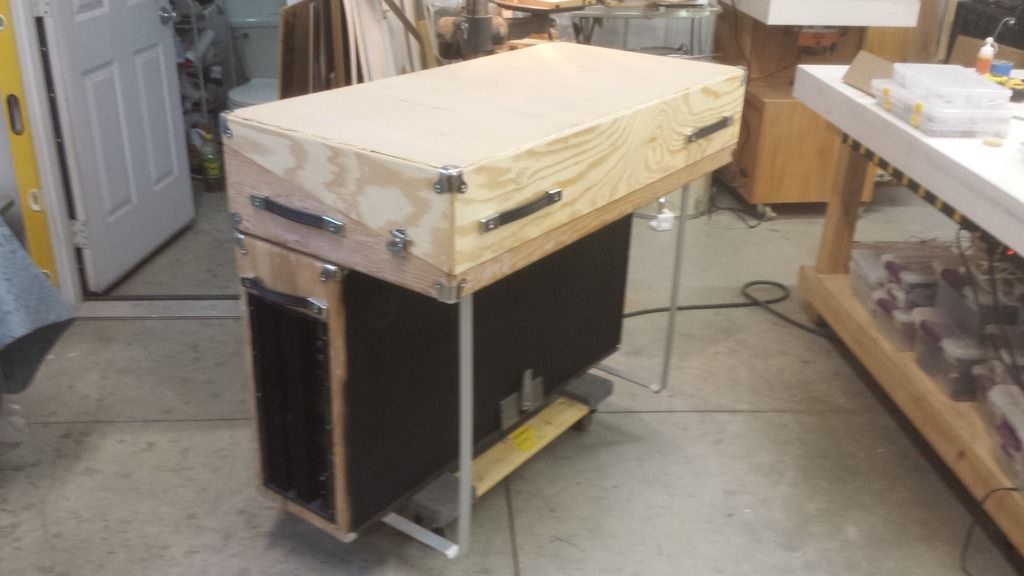
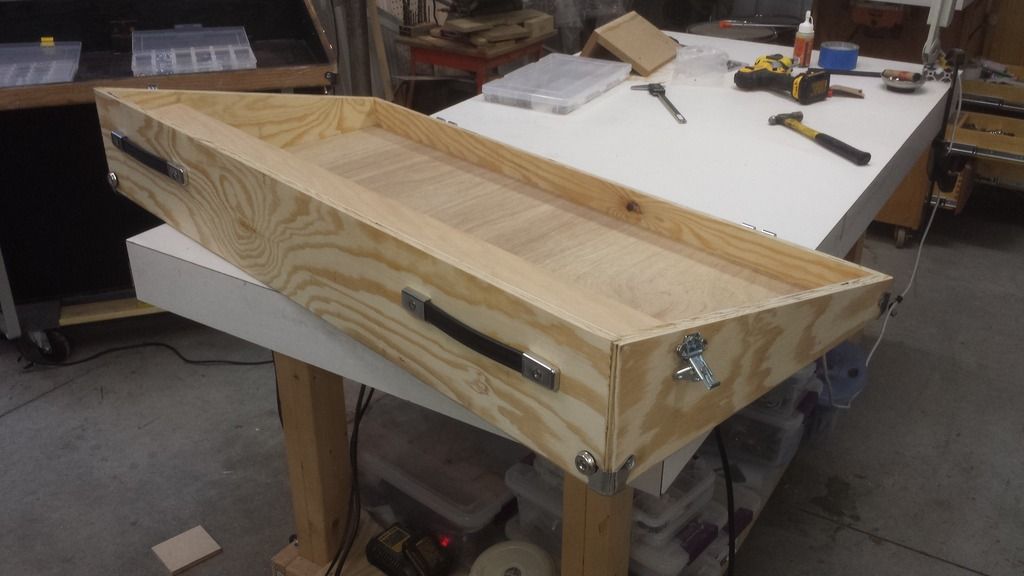
I ended up building two replacement covers; one for the '78 suitcase I have in progress and another for a buddy's '77 Stage.  He doesn't have the loot to Tolex at the moment, so I painted the outside black to protect the wood.  I was a little wary of painting the inside in case the Tolex glue doesn't adhere well to the paint, so I left the inside unpainted. 


#47
I'd caution against removing the tape.  You'd probably kill a number of pickups in the process.
#48
Welcome.  Vintage Vibe has tons of how-to videos on youtube, I recommend spending some time watching the relevant vids before digging in.  And, of course, read the Rhodes service manual.
#50
I ran out of latches, but there will be a third latch in the middle of the compartment.